Saturday 21 November 2015

Carrot & Walnut Cupcakes

Cupcakes are one of my favourite things to bake, perhaps because I am so used to baking them, that now I feel like I have really perfected my technique to a perfect sponge and some great icing flavours. I am always trying different cupcake combos. There is something very heart warming about carrot cakes, they remind me of my Grandmother; her two specialities we're walnut cake and a carrot cake. I can homestly say I have never tasted a cake which could level with hers, they were truly remarkable. I came up with this recipe as a tribute to her and those fantastic masterpieces, as a little girl my Grandmother very often had cakes at the ready, every day, on beautiful cake stands waiting to be devoured by her impatient grandchildren, I would often have a slice of both in a bowl with a demure pouring of single cream and it was delectable! These cupcakes were enjoyable to create as well as eat, and more importantly a sweet, sweet homage.


Carrot & Walnut Cupcakes


Makes 18


125g self raising flour
100g brown sugar 
2 eggs
125softened butter
1/2 tsp baking powder
1 tbsp honey
1 tsp. Cinnamon
1 medium carrot, grated
100g walnuts, pullumed into small pices
200g Icing Sugar
150g Soft cheese
100g Mascapone Cheese

  • Preheat the oven to 195oc and prepare your muffin trays with cupcake cases, I use a 12 and a 6 as this recipe makes 18.
  • In a large mixing bowl cream the butter and the sugar together, once light and fluffy add the honey, cinnamon, grated carrot and walnuts. 
  • Set to one side and in another bowl whisk the 2 eggs.
  • Sift the flour into the mixing bowl gradually, this will produce a very stiff batter. Add the baking soda and then start to add the whisked eggs gradually and a soft and fluffy batter will start to form. 
  • Spoon 1 tbsp. of cake mixture into each cupcake case and once the mixture has been delved out pop into the oven for 15 minutes until golden.
  • In a bowl combine the cream cheese and Mascapone until smooth, then sift in the sugar. Place in the fridge until you're ready to decorate.
  • Once the cakes are cool using a rose head and a piping bag, pipe the icing into the cupcakes and to decorate, i decorate with a walnut and a drizzle of honey!

Reeses Cups Cupcakes

Cupcakes are one of my favourite things to bake, perhaps because I am so used to baking them, that now I feel like I have really perfected my technique to a perfect sponge and some great icing flavours. I am always trying different cupcake combos, and as you may have gathered already I have a bit of a thing for peanut butter! My partner and I are big fans of Reeses Cups and when I found the Grab Bags of Reeses Minis in the supermarket I grabbed a bag as they are just so cute and encorporated them into some cupcakes! There are quite a few elements to these cupcakes which make them extremely special and perhaps even more delicious, the peanut butter frosting is really something, I love the sweet and salty combination which is brought up another level by the layer of Nutella on top. The Nutella is there to level out the cupcakes so they look stylish and set a flat platform to ice but more importantly they add another nutty element, a understand end hazelnut element to these supreme cupcakes!


Reeses Cups Cupcakes


Makes 18


125g self raising flour
125g caster sugar
2 eggs
170g softened butter
1/2 tsp baking powder
1/2 tsp vanilla essence
2 tbsp cocoa powder
3 tbsp. Peanut Butter
500g icing sugar
50ml milk
Grab Bag Reeses Minis

  • Preheat the oven to 195oc and prepare your muffin trays with cupcake cases, I use a 12 and a 6 as this recipe makes 18.
  • In a large mixing bowl cream 125g of the butter and the sugar together. 
  • Set to one side and in another bowl whisk the 2 eggs.
  • Sift the flour into the mixing bowl gradually, this will produce a very stiff batter. Add the baking soda and then start to add the whisked eggs gradually and a soft and fluffy batter will start to form. 
  • Add the vanilla essence and cocoa powder and stir again, set to one side..
  • Spoon 1 tbsp. of cake mixture into each cupcake case and once the mixture has been delved out pop 1 Reeses Mini into the mixture and with the handle of a fork or spoon, push it into the mixture until nestled in. Place the trays into the oven for 15 minutes until golden.
  • In a food processor, Add the remaining 45g butter and the icing sugar and mix in the processor. This will create a very stiff mixture. Using the milk, very gradually add a few drops at a time, checking the icing is not becoming too wet but is also not too stiff. Add the peanut butter and whizz again. Once the icing is ready remove from the processor into a bowl and keep in the fridge until ready to pipe.
  • Once the cakes are cool using a knife, grab the Nutella and level out the sponge with a chocolate layering, then using a rose head and a piping bag, pipe the icing onto the cupcakes and to decorate pop a Reeses Mini on top , however you can decorate how you please!

Friday 20 November 2015

Best Ever Brownies

There are so many brownie recipes out there, some of them are so similar and it can be hard to decipher what one if best for you, or what suites the ingredients you have to hand. These brownies are very simple to make and the process is very quick in comparison to some. They are also completely delicious which helps, my brownie recipe is one I have adapted over quite a long time, I have experimented, tweaked and altered it so many times and finally it is perfect, in my opinion anyway! My brownies have a very fine layer of frosting, the addition of this frosting keeps the brownies nice and moist for up to 3 days. The frosting isn't overly sweet or attention seeking, it does harden when dry, but it adds another texture to the brownies which cant hurt!


Best Ever Brownies

Brownies
1 cup Butter (melted)
1/2 cup Cocoa Powder
2 cups Plain Flour
2 cups Granulated Sugar
4 eggs (separate)
Frosting
1/4 cup Butter (softened)
1/4 cup Milk
1/4 Cocoa Powder
3 cups Icing Sugar

  • Preheat the oven to 200oc and prepare a square brownie tin, the size is up to you, I use a medium tin which makes 12 brownies which are quite thick, but obviously its up to you.
  • In a large bowl combine the melted butter and the cocoa powder and using an electric whisk or mixer, combine.
  • Add the flour and sugar to the mixture and using a wooden spoon, combine.
  • It a separate bowl, separate the 4 eggs, whisk the yolks together in one bowl and add to the brownie mixture, folding in well.
  • Using the electric whisk, blitz the egg whites until fluffy.
  • Fold the egg whites into the mixture, then pour the mixture into the prepared baking tin.
  • Bake for 20-25 minutes, check the centre of the brownies using a cocktail stick.
  • To prepare the frosting, put the butter, milk, cocoa powder and icing sugar in a large bowl and whish until smooth. Place in the fridge until the brownies are ready to decorate. You can decorate the brownie's after about 15 minutes of cooling time.
  • I give this brownies a sprinkling of white chocolate chunks or a little extra element of delight!
Enjoy!


Tuesday 17 November 2015

Dark Chocolate and Peanut Eclairs

This is another one of my recipes which makes sure to include a peanut butter element, as it is my partners favourite and the peanuts add another dimension to these éclairs! My éclairs are not the standard sausage shape, neither are they tiny like a profiterole, they are very rich so they are a size which sits comfortably in between the two. These are a real showstopper as well as being a perfect sharer, they don't last long, it could be that they look amazing, if I do say so myself. What I do like about this recipe is just how easy it is, these sorts of things can be a bit lengthy, and of course that's fine, but when you're as greedy as I am, I cant wait to eat them and after a long day, making these takes a great deal of strength, obviously its when the whipping of the cream and melting of the chocolate starts that it gets really hard. Please enjoy this recipe, its one of my recipes that we love our end and I feel pretty proud to share it with you!


Dark Chocolate and Peanut Éclairs

100g Butter
150g Plain Flour
1 tsp. Salt
4 Eggs
100g Dark Chocolate
400ml Whipping/ Double Cream
2 tbsp. Peanut Butter
50g Peanuts Crushed

  • Preheat the oven to 200oc and prep a baking tray with greaseproof paper.
  • In a large saucepan heat 250ml of water with the butter, flour, salt over a medium heat, stir well until combined.
  • In a separate bowl whisk the eggs.
  • Using an electric whisk, whisk the mixture in the saucepan while gradually adding the eggs, whisk until the mixture is smooth and glossy and the eggs have been well mixed in.
  • Using a piping bag or 2 teaspoons, dot the mixture onto the baking tray, size of ping pong ball, at least 2 cm apart.
  • Grab yourself another baking tray and place 1cm of water onto the tray. Put the éclairs in the oven and on a lower shelf put the watered tray. Bake for 20-25 minutes. Avoid opening the oven door for at least 20 minutes.
  • Once they're cooked, pierce the bottom to allow the steam to escape and place on a tray.
  • In a small saucepan heat 100ml of the double cream until it starts to boil. In a separate bowl, break up the dark chocolate and pour the cream directly onto the chocolate and stir until the chocolate is completely melted and place in the fridge.
  • Using an electric whish, whip the remaining 300ml cream in a bowl, once the cream is whipped, add the peanut butter and whisk until combined.
  • Once the éclairs are cool, grab a piping bag and fill it up with some of the cream, piece the éclairs with the piping knob and pipe a sufficient amount of cream into them. Once you've done this, prepare some crushed peanuts and get the topping out of the fridge.
  • Either dip the éclair into the chocolate or use a large spoon to spread the topping.
  • Sprinkle with crushed peanuts.
Enjoy!

Cinnamon Buns

IEveryone likes a cinnamon bun don't they? They are gorgeous with a cup of tea or nice and warm with a coffee for breakfast. There is something very warming and soothing about cinnamon, it always reminds me of Christmas, I think it has very seasonal properties. I tend to make a big batch of these on a Friday evening so that my partner and I can indulge in these for breakfast at the weekend, or if I have friends staying, they are easy to warm up and they are very easy to make as well; they look and taste very impressive, yet made with very little effort.


Cinnamon Buns

4tsp. Baking Powder
1 cup Brown or White Sugar
3 tsp. Cinnamon
2 Cups Plain Flour
1/2 cup Icing Sugar
1 tsp. Salt
2 tbsp. Sugar for filling
7 tbsp. Butter
1 Cup Milk

  • Start by preheating the oven to 195oc and prep a cupcake tray by lightly greasing the cupcake holes.
  • In a bowl start the filling; combine 1 tbsp. of butter with the 2 tbsp. of sugar and the cinnamon. This will create a very stiff mixture. Set to one side.
  • In a large bowl mix the flour, sugar, baking powder and the salt. Cut in the remaining 6 tbsp. of butter and start to combine with your hands.
  • Stir in the milk gradually to form a soft dough.
  • Lighly flour the surface youre working on and roll the dough out to a 1/4 thickness and shape the dough into a rectangle.
  • Spread the filling on the rolled out surface.
  • Roll up the rectangle and with a sharp knife cut into 12 small rolls.
  • Place the rolls into the tin and bake for 20-25 minutes until golden.
  • While the cinnamon buns are baking, prep the icing for the top of the buns. Mix the 1/2 cup of icing sugar with 50ml of water. Mix until the power has dissolved and pop into the fridge.
  • Decorate the buns when they are cool.


Enjoy this recipe and let me know how you get on!!

Monday 16 November 2015

Cookies and Cream Truffles

I often make a batch of truffles to take to work or even as a gift, they are perfect to pack up in little bags with ribbon, they look and taste great. They are so easy as well which is the best bit and they are made with very few ingredients. What I like about this recipe is that they keep very well, they don't go soggy, they stay firm yet creamy inside.


Cookies and Cream Truffles

500g Chocolate chip biscuits
300g cream cheese
200g White Chocolate
sprinkles 

In a food processor blitz the biscuits until fine crumbs.
Add the cream cheese and blitz again.
With the mix, roll the mix into balls, just a little bigger than a marble. 

Place the truffles in the fridge and break the chocolate into chunks and melt.
Once the chocolate is melted, using a teaspoon, place the truffles one by one in the chocolate and cover in chocolate and place on a tray.

Sprinkle the truffles to decorate and refrigerate!


Coffee and Chocolate Cupcakes

Perfect for a tea party is all I can say. These are a modern and fashionable table piece, which would be perfect for a party as well as an afternoon treat. I tend to make these on a Saturday afternoon if my family are about, to have a cuppa and catch up with. They have a smooth and creamy texture to them, and the coffee flavour which is broken down by the chocolate is a match made in heaven. Truly Delectable.


Coffee and Chocolate Cupcakes


Makes 18


125g self raising flour
125g caster sugar
2 eggs
170g softened butter
1/2 tsp baking powder
1/2 tsp vanilla essence
200g Nutella
2 tbsp. Cocoa Powder
400g icing sugar
2 tbsp. Instant Coffee dissolved with 50ml Boiling Water
100g Butter

  • Preheat the oven to 195oc and prepare your muffin trays with cupcake cases, I use a 12 and a 6 as this recipe makes 18.
  • In a large mixing bowl cream 125g of the butter and the sugar together. 
  • Set to one side and in another bowl whisk the 2 eggs.
  • Sift the flour, baking powder and cocoa powder into the mixing bowl gradually, this will produce a very stiff batter. Add the baking soda and then start to add the whisked eggs gradually and a soft and fluffy batter will start to form. 
  • Add the vanilla essence and 20ml of coffee, stir again add set to one side. 
  • Spoon 1 tbsp. of cake mixture into each cupcake case and once the mixture has been delved out pop into the oven for 15 minutes until golden.
  • In a food processor, blitz the icing sugar, 50g butter and 30ml coffee. This will create a very stiff mixture. Using the milk, very gradually add a few drops at a time, checking the icing is not becoming too wet but is also not too stiff. Once the icing is ready remove from the processor into a bowl and keep in the fridge until ready to pipe.
  • Once the cupcakes are cool, using a knife spread a small amount of nutella onto the cupcake and level out the cupcake. Once you have done this repeat with the rest of the batch.
  • Using a rose head and a piping bag, pipe the icing onto the cupcakes and to decorate I grate some chocolate on top but it is completely up to you.

Enjoy!!


Ice Cream Cupcakes

These cupcakes are cushioned within a crispy ice cream cone, they are delicious, fun and impressive. I first made these for my friends birthday party and they got such a good response, I have been sure to provide them for similar events. They put a great big smile on peoples faces. this recipe allows you to be creative with decoration and imaginative with your flavour combinations. Here is my recipe, but please comment below if you have ideas for flavours and designs etc. that you would like to share. I have made many combinations; chocolate, white chocolate and even a baileys flavour. These flavours are changeable within the icing, I tend to keep my sponge a vanilla one as I know this sponge bodes well with the ice cream cone and doesn't make the cones soggy.


Ice Cream Cupcakes

Makes 18


125g self raising flour
125g caster sugar
2 eggs
170g softened butter
1/2 tsp baking powder
2 tsp vanilla essence
100g Butter
500g icing sugar
Splash of Milk
Sprinkles
Paper Straws
Ice Cream Cones

  • Preheat the oven to 195oc and prepare deep cake tins or loaf tins with the ice cream cones, they will support each other if placed together.
  • In a large mixing bowl cream 125g of the butter and the sugar together. 
  • Set to one side and in another bowl whisk the 2 eggs.
  • Sift the flour into the mixing bowl gradually, this will produce a very stiff batter. Add the baking soda and then start to add the whisked eggs gradually and a soft and fluffy batter will start to form. 
  • Add 1 tsp. vanilla essence, stir again.
  • Spoon 1 tbsp. into each of the ice cream cones and bake for 15 minutes or until golden.
  • In a food processor, blitz the icing sugar with the butter and a splash of milk to ensure the icing doesn't become too thick. If it does add a little more milk.
  • Once the cakes are cool using a rose head and a piping bag, pipe the icing into the cupcakes and to decorate give a shake of sprinkles and pop a paper straw into the icing for added effect.

Enjoy!!

Toffee Popcorn Cake

I have made a couple of these cakes as they are a very effective design as well as being so scrumptious, they are a toffee overload, which a crunchy topping, but one of the best things about this cake is the sponge. This is a very fun cake as well as tasty, and I like to take advantage of the fact that it is a very sweet cake, so you can get a way with making it even sweeter, if you know what I mean. This cake sponge is enlightened with melted marshmallow which gives the sponge an airy and fluffy texture which works so well with this cake as they icing is heavily sweet and that can be a little over-powering, so the sponge gives this can a different dimension in some ways. The popcorn topping is sensational, as a big lover of pop corn anyway I knew I would enjoy a cake such as this, but if you layer up the popcorn quite high and you keep it covered and airtight, the popcorn wont go soft, it will keep its crunch, which is what you want this cake. I first experimented with this idea for my step-brothers birthday cake and since then its been in steady demand as a showstopper for family gatherings.


Toffee Popcorn Cake

250g self-raising flour
250g granulated sugar
250g softened butter
4 eggs
2 tsp. baking powder
100g Marshmallows
2tbsp. Vanilla Extract
400g Icing Sugar
100g Butter
Splash of milk
1 bag Toffee Popcorn
2 Grab Bags of Toffees


  • Preheat the oven to 195oc and pace baking paper in two 9 inch round tins.
  • In a large mixing bowl, cream the sugar and the butter together until light and fluffy.
  • In a separate jug, whisk the eggs together and set to one side.
  • Weigh out the flour, and baking powder and gradually add to the cream and sugar mixture. This will be a little tough and thick however once the flour has been added, proceed to add the egg mixture. Mix until thick.
  • Place the marshmallows in a bowl and microwave until they have all melted, then add to the mixture and stir until well combined.
  • The mixture will need to be correctly halved and placed in the tins. To do this use 2 bowls to divide the mixture out evening, or estimate if you aren't too fussed.
  • Bake the sponge for 15 minutes, until golden brown and springy.
  • While the sponges are baking, you can use this time to make your icing. In a food processor, place the icing sugar with the butter. If the mixture is a little stiff, add a splash of milk to lighten it up. Once the mixture perfect, add the vanilla and mix again.
  • Pop in the fridge until the sponges are cold.
  • Once the cakes are ready to ice, take some of the icing to sandwich both sponges  together, then proceed to ice the sides and the top of the sponges.
  • Unwrap the toffees, 1 1/2 bags and place in a  bowl, pop in the microwave for 3 minutes, on a medium heat, stirring every 30 seconds. Once the toffees have been melted place to one side for 3-4 minutes.
  • To cover the cake, pour the toffee over the cake and using a spatula push right to the sides, once the toffee hits the cake it will cool dramatically, so the toffee should set halfway down the cake giving that melted appearance.
  • Top the cake with the popcorn, doing a layer at a time.
  • Unwrap the rest of the toffee and melt in the microwave again, this time, drizzle the popcorn straight away.


If you have any tips or questions please comment below.
Enjoy!


Shortbread


I love Shortbread. Perfect with a cup of tea and a fantastic pick me up. Although such a beautiful classic, I sometimes feel like injecting just a little bit of life into those melt-in-your-mouth little beauties.


I often bake a batch of Shortbread to take to a friends or my mums house, 'never turn up empty handed' as my grandmother use to say. I have come up with some fantastic flavour combinations which work so well with the buttery and crumbly classic biscuit and bring them to life.


To be honest, my recipe for shortbread is a very simple one and copes well with being added too, which made it so easy to extend the recipe and add flavours. Once I have brought all the ingredients together in each recipe, the dough is to be wrapped up in cling film and set aside in the fridge for 20 minutes, this helps film the dough and makes it easier to roll out, esspeccially when you have multiple fillings in your Shortbread. What you can do, is roll your dough into a sausage shape and then wrap and store, this way you can simply slice the round biscuits straight off the dough.


I have 3 particular Shortbread Recipes which I think work so well, they don't over power, they simply and delicately bring life to this classic Highland Recipe.

Each recipe makes 18 Shortbread biscuits


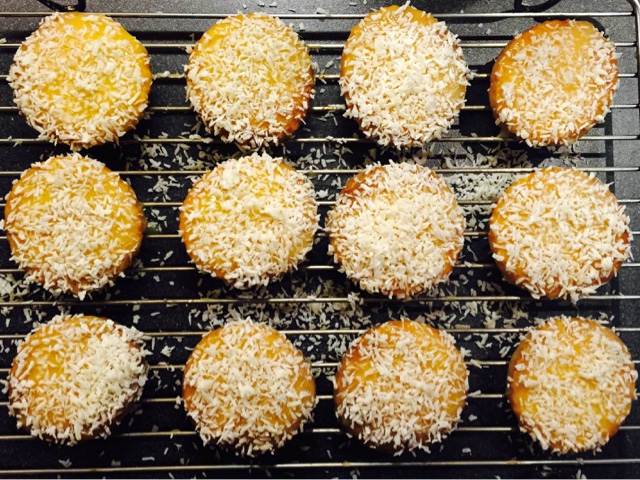
Lemon and Chia Seed Shortbread

This recipe creates a very soft and moist Shortbread biscuit, the Chia seeds give real bite!


150g Plain Flour
50g Caster Sugar
100g Softened Butter
1/2 tsp Vanilla Extract
1 Lemon
3 tbsp. Chia Seed
50g Icing Sugar (optional)
  • Preheat oven to 180 c and line a baking tray with baking parchment.
  • Grate the lemon for skin, once you've don't this, cut the lemon in half, you'll use one of the halves of the lemon for the juice.
  • In a large mixing bowl, combine the flour (no need to sift, although its up to you), sugar and the butter (break into chunks) and rub together with your fingers, when the dough starts to form add the vanilla, lemon skin and the chia seeds.
  • Take one of the halves of lemon and give it a good squeeze into the mixture. Once you've done this, mix he added elements into the dough until evenly spread.
  • Pop the dough into some cling film and refrigerate for 20 minutes.
  • when the dough is ready, roll out to your desired thickness and using a knife or a cutter, cut out your shortbread.
  • Transfer to a baking tray and bake for 10-15 minutes, or until golden brown.
  • I often drizzle my shortbread with some icing sugar but allow to cool for 5 minutes first.

Mocha Shortbread

This is a truly famous flavour combination which works tremendously and is almost even better, in my opinion, when woven into shortbread. I was desperate to try this combination once I'd had the idea and I couldn't be more pleased I gave it a go, as it is my ultimate favourite!


150g Plain Flour
50g Caster Sugar
100g Softened Butter
1/2 tsp. Vanilla Extract
1 tsp. Granulated coffee
2 tbsp. boiling water
2 tbsp. Cocoa Powder/Hot Chocolate
  • Preheat oven to 180 c and line a baking tray with baking parchment.
  • In a small jug dissolve the coffee granules with the kettle boiled water and set to one side.
  • In a large mixing bowl, combine the flour (no need to sift, although its up to you), sugar and the butter (break into chunks) and rub together with your fingers, when the dough starts to form add the cocoa powder or hot chocolate powder.
  • Gradually add the dissolved coffee, mixing the dough as you add the liquid.
  • You might find that the coffee has a marbled appearance within the dough, I tend to keep this, once they are baked it gives a real stunning appearance to this biscuits.
  • Pop the dough into some cling film and refrigerate for 20 minutes.
  • when the dough is ready, roll out to your desired thickness and using a knife or a cutter, cut out your shortbread.
  • Transfer to a baking tray and bake for 10-15 minutes, or until golden brown.


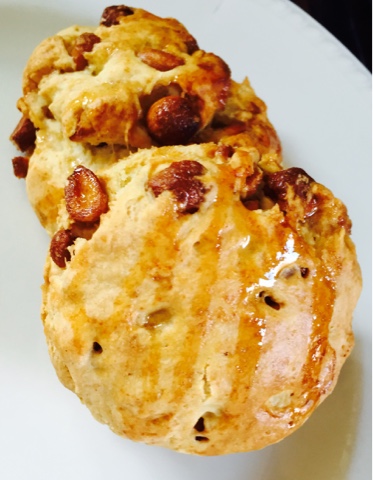
Honey and Cashew Nut Shortbread

This is such a seasonal recipe, and one that fits in with autumn and winter so very well. The flavours are very sweet and warming, especially with the sweet honey running through them. These are my partners favourite, as well as being a big Shortbread fan, he loves honey roasted cashews. I've tried this recipe with both plain and honey roasted cashews and both work very well. The honey roasted cashews give a bit more bite to the Shortbread.

150g Plain Flour
50g Caster Sugar
100g Softened Butter
1/2 tsp Vanilla Extract
1 tbsp. Honey
3 tbsp. Crushed Cashew Nuts
  • Preheat oven to 180 c and line a baking tray with baking parchment.
  • In a food processor or using a sandwich bag and a rolling pin, whizz the nuts into small pieces. 30 seconds maximum in the food processor.
  • In a large mixing bowl, combine the flour (no need to sift, although its up to you), sugar and the butter (break into chunks) and rub together with your fingers, when the dough starts to form add the honey and the nuts.
  • Pop the dough into some cling film and refrigerate for 20 minutes.
  • when the dough is ready, roll out to your desired thickness and using a knife or a cutter, cut out your shortbread.
  • Transfer to a baking tray and bake for 10-15 minutes, or until golden brown.
  • I often drizzle my shortbread with some more honey, to give a shiny finish!


Enjoy these recipes guys, let me know how you get on
BBx


Coconut Custard Creams

Its hard to beat a classic custard cream biscuit, they are perfection, I can pop one in after the other, they are simply delicious and to be completely honest with you, they are so cheap in supermarkets these days. You can buy a pack of 50 for next to nothing, its incredible. So if there any real need to make your own?
Of course there is! You can beat homemade.
I did quite a bit of playing around with this recipe until I decided I had perfected a tremendous tribute to the Custard Cream and as you may have already guessed there is an addition of coconut to the biscuit, but I felt that the coconut gives the biscuit a real silky taste, its delectable!

I've had a few people taste this recipe now and I have had such good feedback that I couldn't wait to share this.

Coconut Custard Creams

100g Unsalted Butter, Softened
50g Caster Sugar
100g Plain Flour, plus extra for rolling out
1 Tin of Custard
25g Corn Flour
150g Icing sugar

18 Biscuits
  • To make the biscuits beat the butter and sugar until pale and fluffy. Sift the flour into the mix and stir thoroughly.
  • Now add 3 tbsp. of the tinned custard to the mix. Stir well, pop into some cling film and refrigerate for 20 minutes.
  • While you wait, preheat the oven to 185 oc, prepare a baking tray with parchment and dust the work surface with flour.
  • I didn't go with the classic sandwich filling for these biscuits, I made up an icing popping with produced a glossy and shinny, almost icy looking finish on the biscuits.
  • For the icing and half of the tin of custard to a mix bowl and then add the icing sugar and give a good stir. You may think, 'this looks a bit thin'. put the mixture in the fridge, it will harden slightly by the time you come to decorate the biscuits but also once you decorate the biscuits and they dry, the icing will dry.
  • Once the dough has spent 20 minutes in the fridge, roll out to the desired thickness and using a round cutter, cut out the biscuits and place on the baking tray.
  • Bake for 10-12 minutes until golden.


  • Once the biscuits are cool, dip top first into the mixture and place on the cooling rack. Repeat with all the biscuits.


  • To finish dust with coconut shavings.


    Enjoy!

Stilton & Mustard Scones

I absolutely love Scones! I will be posting several scone related recipes over the next couple of days. There is nothing more suitable to enjoy on a Sunday afternoon than a warm scone, sweet or savoury and a sweet cup of tea. Whether you smother your scone in cream cheese, butter or clotted cream and jam, there is a truly British element to this past time and it is one tastes so good.

I always enjoy baking Scones, there is a certain victorious feeling when you take them out of the oven and they have grown from pale doughy balls to soft, golden brown and shinny topped scones, and I know that you could say that about many things but Baking Scones is very nostalgic for me. 

Over time I have developed several recipes which have graduated away from the norm of fruit Scones and there are several which have stuck with me that I tend to make on a regular basis. Don't get me wrong, I love fruit Scones, there is nothing better than plump juicy sultanas cushioned by the sweet dough of a Scone but sometimes you've got to mix things up right?!

Makes 12


Stilton & Mustard Scones

450g Self-Raising Flour
2 tsp. Baking Powder
75g Butter
50g Caster Sugar
2 Eggs
220ml Milk
2 tbsp. Mustard
100g Stilton
  • Line 2 baking brays with parchment and preheat the oven to 220oc
  • Using a large mixing bowl, add the flour, baking powder and butter into a crumble like mixture, use your fingertips to do this. Once you've don't this add the sugar.
  • Beat the eggs together in a jug, add milk to mixture, making it up to 300ml. Gradually add the wet mixture to the crumb mixture and combine until a dough has formed, try and keep a little bit of the wet mixture in order to brush the Scones before they go in the oven to give a glossy and shiny finish.
  • You will find that the dough is quite sticky, this is what you want as it will ensure the mixture rises well once in the oven.
  • At this point you can add the mustard and stilton, fold into the dough until spread evenly.
  • Turn the dough out onto a floured surface and flatten it out first with your hands and then proceed to use a rolling pin; roll out to a 1-2cm thickness. Using a cookie cutter or a cup, push down into the dough, twist slightly and lift the scone straight out onto the tray. Place 6 on each tray, with a generous amount of room between each one.
  • Brush the tops of the Scones with the remaining egg and milk mixture and bake for 12-15 minutes until the Scones are well risen and golden.


Any questions or queries please get in touch
BBx


Fruit and Nut Scones

I absolutely love Scones! I will be posting several scone related recipes over the next couple of days. There is nothing more suitable to enjoy on a Sunday afternoon than a warm scone, sweet or savoury and a sweet cup of tea. Whether you smother your scone in cream cheese, butter or clotted cream and jam, there is a truly British element to this past time and it is one tastes so good.

I always enjoy baking Scones, there is a certain victorious feeling when you take them out of the oven and they have grown from pale doughy balls to soft, golden brown and shinny topped scones, and I know that you could say that about many things but Baking Scones is very nostalgic for me. 

Over time I have developed several recipes which have graduated away from the norm of fruit Scones and there are several which have stuck with me that I tend to make on a regular basis. Don't get me wrong, I love fruit Scones, there is nothing better than plump juicy sultanas cushioned by the sweet dough of a Scone but sometimes you've got to mix things up right?!

Makes 12


Fruit and Nut Scones

450g Self-Raising Flour
2 tsp. Baking Powder
75g Butter
50g Caster Sugar
2 Eggs
220ml Milk
100g Peanuts, Cashews or Walnut (or mix)
100g Sultanas
  • Line 2 baking brays with parchment and preheat the oven to 220oc
  • Using a large mixing bowl, add the flour, baking powder and butter into a crumble like mixture, use your fingertips to do this. Once you've don't this add the sugar.
  • Beat the eggs together in a jug, add milk to mixture, making it up to 300ml. Gradually add the wet mixture to the crumb mixture and combine until a dough has formed, try and keep a little bit of the wet mixture in order to brush the Scones before they go in the oven to give a glossy and shiny finish.
  • You will find that the dough is quite sticky, this is what you want as it will ensure the mixture rises well once in the oven.
  • At this point you can add the fruit and nuts, fold into the dough until spread evenly.
  • Turn the dough out onto a floured surface and flatten it out first with your hands and then proceed to use a rolling pin; roll out to a 1-2cm thickness. Using a cookie cutter or a cup, push down into the dough, twist slightly and lift the scone straight out onto the tray. Place 6 on each tray, with a generous amount of room between each one.
  • Brush the tops of the Scones with the remaining egg and milk mixture and bake for 12-15 minutes until the Scones are well risen and golden.
  • To finish I give these scones a drizzle of honey while they're warm


Any questions or queries please get in touch
BBx

Walnut, Honey and Cinnamon Scones


I absolutely love Scones! I will be posting several scone related recipes over the next couple of days. There is nothing more suitable to enjoy on a Sunday afternoon than a warm scone, sweet or savoury and a sweet cup of tea. Whether you smother your scone in cream cheese, butter or clotted cream and jam, there is a truly British element to this past time and it is one tastes so good.

I always enjoy baking Scones, there is a certain victorious feeling when you take them out of the oven and they have grown from pale doughy balls to soft, golden brown and shinny topped scones, and I know that you could say that about many things but Baking Scones is very nostalgic for me. 

Over time I have developed several recipes which have graduated away from the norm of fruit Scones and there are several which have stuck with me that I tend to make on a regular basis. Don't get me wrong, I love fruit Scones, there is nothing better than plump juicy sultanas cushioned by the sweet dough of a Scone but sometimes you've got to mix things up right?!

Makes 12


Walnut, Honey and Cinnamon Scones

450g Self-Raising Flour
2 tsp. Baking Powder
75g Butter
50g Caster Sugar
2 Eggs
220ml Milk
50g Walnuts
1 tbsp. Cinnamon
2 tbsp. Honey
  • Line 2 baking brays with parchment and preheat the oven to 220oc
  • Using a large mixing bowl, add the flour, baking powder and butter into a crumble like mixture, use your fingertips to do this. Once you've don't this add the sugar.
  • Beat the eggs together in a jug, add milk to mixture, making it up to 300ml. Gradually add the wet mixture to the crumb mixture and combine until a dough has formed, try and keep a little bit of the wet mixture in order to brush the Scones before they go in the oven to give a glossy and shiny finish.
  • You will find that the dough is quite sticky, this is what you want as it will ensure the mixture rises well once in the oven.
  • At this point you can add the walnuts, honey and cinnamon, fold into the dough until spread evenly.
  • Turn the dough out onto a floured surface and flatten it out first with your hands and then proceed to use a rolling pin; roll out to a 1-2cm thickness. Using a cookie cutter or a cup, push down into the dough, twist slightly and lift the scone straight out onto the tray. Place 6 on each tray, with a generous amount of room between each one.
  • Brush the tops of the Scones with the remaining egg and milk mixture and bake for 12-15 minutes until the Scones are well risen and golden.


Any questions or queries please get in touch
BBx

Easy Pork and Mustard Sausage Rolls


November is well and truly upon us, the shops and supermarkets are filling up with Christmas goods, streams of red and green blind us, Christmas cakes are already in preparation mode and supermarkets are taking orders for turkeys... already!

Christmas Eve in our house is our time to gorge on anything and everything considered a party premium and sausage rolls are a true favourite of mine. Crispy warm puff pastry, light as a feather, delectable and buttery, engulfing the warm rich sausage inside.

My favourite Sausage Rolls are pork and mustard. I think this combination is an important one, whenever I plonk a sausage casserole or sausage and mash on the table for tea, I always smother my sausages in mustard, perfect. So, I tried the combination in a sausage roll, and I must say, its absolutely delicious.


Pork & Mustard Sausage Rolls

Olive Oil
1 Red Onion (well chopped)
Dried Sage
6 Good Quality Sausages
Mustard (English or Wholegrain)
1 Egg
250g Ready Made Puff Pastry

  • Start by preheating the oven to 180oc and preparing 2 baking trays with greaseproof paper.
  • Heat 1 tsp. of olive oil in a saucepan and add the red onion which should be finely chopped.
  • Add 1 tsp. of the dried sage. You can use fresh sage, but seeing's as you don't need much I simply advise dried as its something you quite often find in your kitchen cupboards!
  • Once the onions are brown, leave to one side and prep the sausages. Make a slit in the skins and squeeze the meat out into a bowl, once you've repeated with all 6 sausages, give the mixture a good stir and then add the browned onions and stir again.
  • On a floured work surface, roll the pastry out into a large rectangle and cut it length ways into two long, even rectangles.
  • Spread the desired amount of mustard on the pastry then take the sausage mixture and using your hands roll the mixture into sausage shapes and lay along the centre of each rectangle.
  • In a separate bowl whisk the egg and brush the pastry with the egg, then fold over one side wrapping the filling inside.
  • Press the edges down with your fingers or the edge of a spoon to seal the join.
  • Cut the long rolls into the sizes you want and space them out on the baking tray. Brush with the rest of the egg wash and then proceed to make several slits in the top of the rolls.
  • Bake for 25 minutes or until puffed and golden.


Breadsticks

Breadsticks are perfect for an on the go snack, a starter or a party piece. They are a very versatile snack, they allow a variation of ingredients and flavours depending on your theme or cuisine. I regularly bake breadsticks, they are gorgeous with hummus which is another one of my favourite healthy indulgences.


I have two flavour combinations which I often make; Paprika Breadsticks and Parmesan and Pancetta Breadsticks. The paprika recipe is one that I tend to make for an everyday snack, perfectly crisp with just the right amount of heat and absolutely delectable dipped in hummus.
The Parmesan and Pancetta recipe is one I pull out if I have family or friends coming over for a buffet style dinner or party. They're suitably moreish, chewy and salty; they go amazingly well with a sour cream dip.

I am often testing this recipe out with various flavours, so I urge you to do the same! Let me know how you get on.


Breadsticks

2x 75g Butter Melted
280g Plain Flour
31/2 tsp. Baking Powder
1 1/2 tsp. salt
225ml Milk
1 tbsp. Paprika (Paprika Recipe)
250g Parmesan Shavings (Parmesan & Pancetta Recipe)
3 Stripes Pancetta Sliced (Parmesan & Pancetta Recipe)


  • Preheat the oven to 220oc. Place the butter on a lipped baking trays (both with 75g butter) and set to on side.
  • In a large mixing bowl, combine the flour, baking powder and salt and mix well.
  • Stir in the milk until just moistened, do not over mix.
  • At this point if you are making paprika breadsticks, add the paprika and mix. If you are making Parmesan and Pancetta breadsticks add 200g of the parmesan and add the sliced pancetta and mix well.
  • Turn the dough out onto a floured surface and knead lightly for 3-4 minutes.
  • Roll the dough out into a rectangle and using a knife sharpen the edges.
  • At this point pop the baking trays into the oven until the butter is melted and then have the trays nearby for the breadsticks.
  • Cut into 1.5cm wide stripes, lift the stripes one by one from the work surface and twist several times before putting them onto the trays.
  • Give the breadsticks a good sprinkling of salt and pepper, or the remaining 50g of Parmesan if you are making the Parmesan and Pancetta Breadsticks.
  • Out the trays into the oven and bake for 15-20 minutes or until golden brown.


Cookie Mad: Peanut Butter Chocolate Cookies

I cant quite decide what I prefer: making cookies, inventing recipes, or actually eating them. They are one of my favourite treats which are always so moreish. I have to admit to a few times driving 20 minutes to the supermarket to buy a bag of 5 double chocolate cookies and eating all of them on the 20 minute drive home, they are so addictive!


These days when I have a cookie craving I tend to get cooking ASAP and I can devoir more delicious cookies and a larger batch of them at that!
I have tried a few variations of this recipe but I think that finally I have got it just right. As much as a cookie fiend I am, I am an even bigger peanut butter fan, I am constantly trying to find new ways to bring peanut butter into a recipe.


Peanut Butter Chocolate Cookies

100g of dark chocolate or dark chocolate chips
1 egg
125g granulated sugar
50g Plain Flour
 2 tbsp. Peanut Butter
50g Peanuts

  • Preheat the oven to 195oc and prepare two baking trays with greaseproof paper.
  • In a large mixing bowl combine the sugar and the flour, then crack the egg into the mixture and stir.
  • Add the chocolate chips or cut your chocolate into small chunks and add to the mixture.
  • Now add the 2 tbsp. of peanut butter and mix well.
  • Using teaspoons, create small balls with the mixture, no bigger than a ping pong ball. The mixture will be pretty sticky, place 6 on each tray spreading out evening.
  • Once you have dished out the mixture, flatten the balls slightly with a fork.
  • Bake for 12 minutes until golden.
These cookies are amazing warm, so get in there as soon as they come out of the oven, they are so hard to resist. Why not try a couple in a bowl with a scoop of ice cream, trust me its amazing!


Cookie Mad: White Chocolate & Plum Cookies

I cant quite decide what I prefer: making cookies, inventing recipes, or actually eating them. They are one of my favourite treats which are always so moreish. I have to admit to a few times driving 20 minutes to the supermarket to buy a bag of 5 double chocolate cookies and eating all of them on the 20 minute drive home, they are so addictive!
These days when I have a cookie craving I tend to get cooking ASAP and I can devoir more delicious cookies and a larger batch of them at that!


I have recently been trying out some more adventurous cookie combinations and this recipe was most definitely one of my most adventurous, I wasn't sure the flavours would go together but the sweetness of the white chocolate went so well with the soft and moist plums. The plums gave the cookies a fantastic texture, very moist and perfectly doughy.
This recipe is quite seasonal, very Christmassy, this season welcomes spiced plums in many deserts, so this may just be a Christmas treat to add to your list!


White Chocolate & Plum Cookies

100g of white chocolate chips
1 egg
125g granulated sugar
125g Plain Flour
 75g Butter (melted)
50g Tinned Plums

  • Preheat the oven to 195oc and prepare two baking trays with greaseproof paper.
  • In a large mixing bowl combine the sugar and the flour, then crack the egg into the mixture and stir.
  • Add the chocolate chips and the plums.
  • Now add the butter and mix well.
  • Using teaspoons, create small balls with the mixture, no bigger than a ping pong ball. The mixture will be pretty sticky, place 6 on each tray spreading out evening.
  • Once you have dished out the mixture, flatten the balls slightly with a fork.
  • Bake for 12 minutes until golden.


These cookies are amazing warm, so get in there as soon as they come out of the oven, they are so hard to resist. Why not try a couple in a bowl with a scoop of ice cream, trust me its amazing!